In the cottage my father had put a lot of wine grapes that he had brought from the Cyclades, Greek islands. Wine grapes produce grapes that are essentially suitable for the production of wine.
In the small vineyard, among the vines, he had also put in some table grape varieties that produce delicious, sweet and seedless grapes.
As is easy to understand, these grapes are prized in the summer, unlike the wine grapes.
I have long wanted to graft some wine grape vines with the variety that produces table grapes. This way I could “take advantage” of a mature and established vine, with a deep root system, to quickly produce table grapes.
For some time, however, I was afraid to do so. I was afraid I would fail and destroy an old vine.
But this year I gave it a try. I grafted a wine grape with a table variety.
We can place the graft in two parts.
A) The scion can be placed at the base of the vine we want to graft, so we will need to cut the vine from the base (10 to 15 cm from the soil).
B) The scion can be placed on a branch of the vine well above the soil (e.g. a meter or more). In this case, the vine will be half of the original variety and half of the new variety above the scion.
To avoid confusion I will call the old vine OLD and the scion from the other vine NEW.
The process is relatively simple. In a nutshell it is as follows:
- When we prune the NEW vine we keep a few strong and healthy branches with eyes on the side.
- We cut the OLD vine vertically.
- Wedge two scions from the NEW vine into the OLD vine.
- Tie the joint securely.
- Put soil around the joint.
- Wait for spring when the eyes open.
Suitable time for grafting the vine
The process of grafting the vine is definitely done before March. I did it in February.
If you prune the vines earlier (many people do it in September, October) then you should keep the candidate branches (scions) for grafting and bury them in the soil. That way they will retain their moisture and not dry out. You will be able to use them when the time comes.
Vine grafting procedure
Cut the OLD vine with a saw (by hand) as horizontally as possible.
With a sharp large knife, split the cut in the OLD vine in half.
(inside this cut and at the ends we will place the branches from the NEW vine (scions))
Select two scions from the NEW vine that are healthy, vigorous and have bulbs on them.
We create a wedge at the bottom of the branches (they should be wedged into the cut we made in the OLD vine).
Cut the top of the NEW branches (scions) to such a length that there are one or two healthy bulbs in the remaining length.
Insert the two NEW branches (scions) into the cut in the OLD vine. The secret here is that the branches (stems) should be placed so that their outer part is touching the outer part of the OLD vine. We should make sure that there is no step, but that the circumference of the OLD and NEW vine look like a natural continuity.
As we have placed the two scions from the NEW vine into the intersection of the OLD vine like wedges, a gap of a few millimeters has been created in the center. This gap needs to be filled to prevent contamination and more importantly loss of the precious juice that will begin to gush out when the vine starts to weep.
Cover this gap with cotton wool which, with the help of a knife, is inserted into the incision. Then cover the entire incision and the places where the stems join the OLD vine with waterproof paper (e.g. oilcloth). Tie the whole system tightly and securely with string so that there is good contact between the OLD vine and the moles from the NEW vine.
In the next step we want to keep the place moist. We don’t want the joint to dry out.
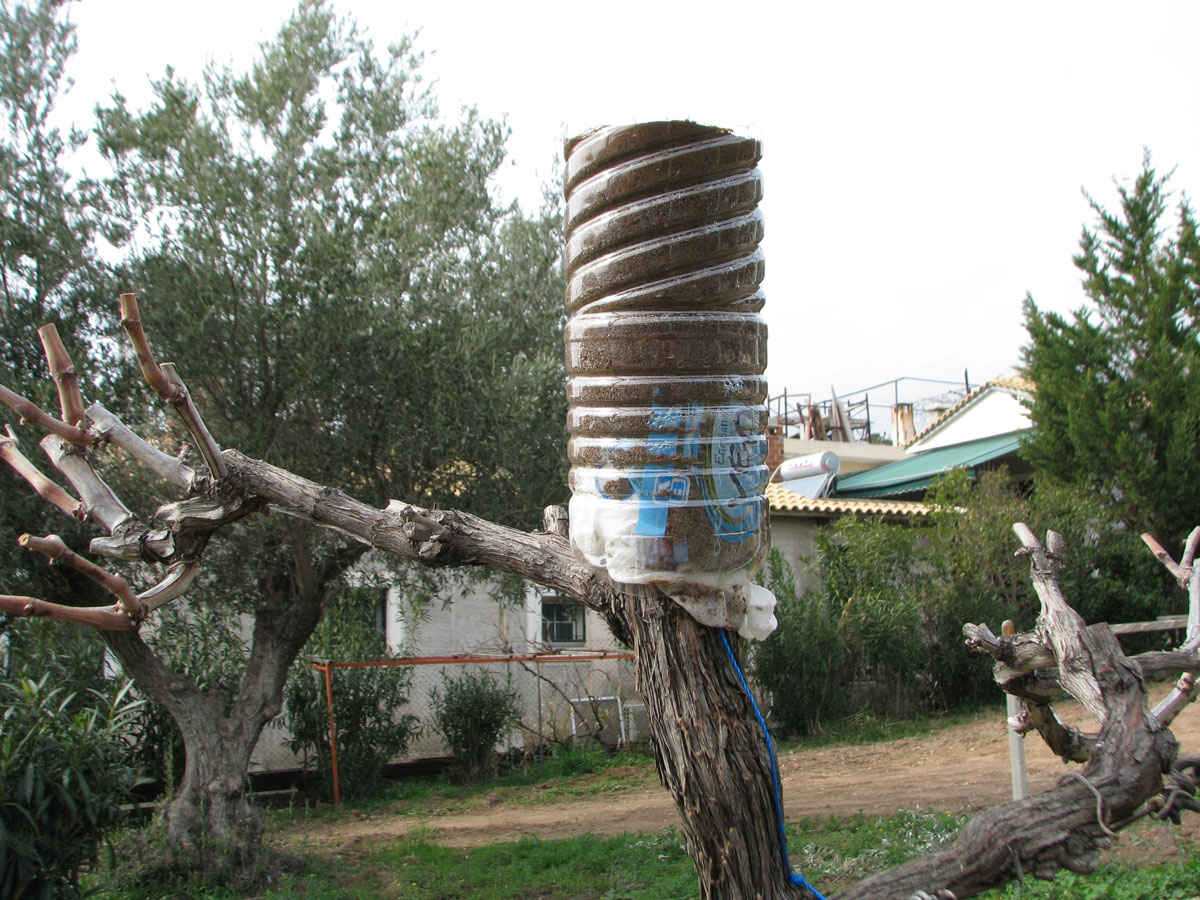
To do this, we place a cut plastic water bottle around the compound and fill it with soil from the garden. The soil should completely cover the marbles from the NEW vine. Over the next few days, we regularly wet the soil to keep the soil moist.
Two months later, if all has gone well, you will see the bulbs open and the NEW variety growing on the OLD vine.
Practical application. Grafting the vine
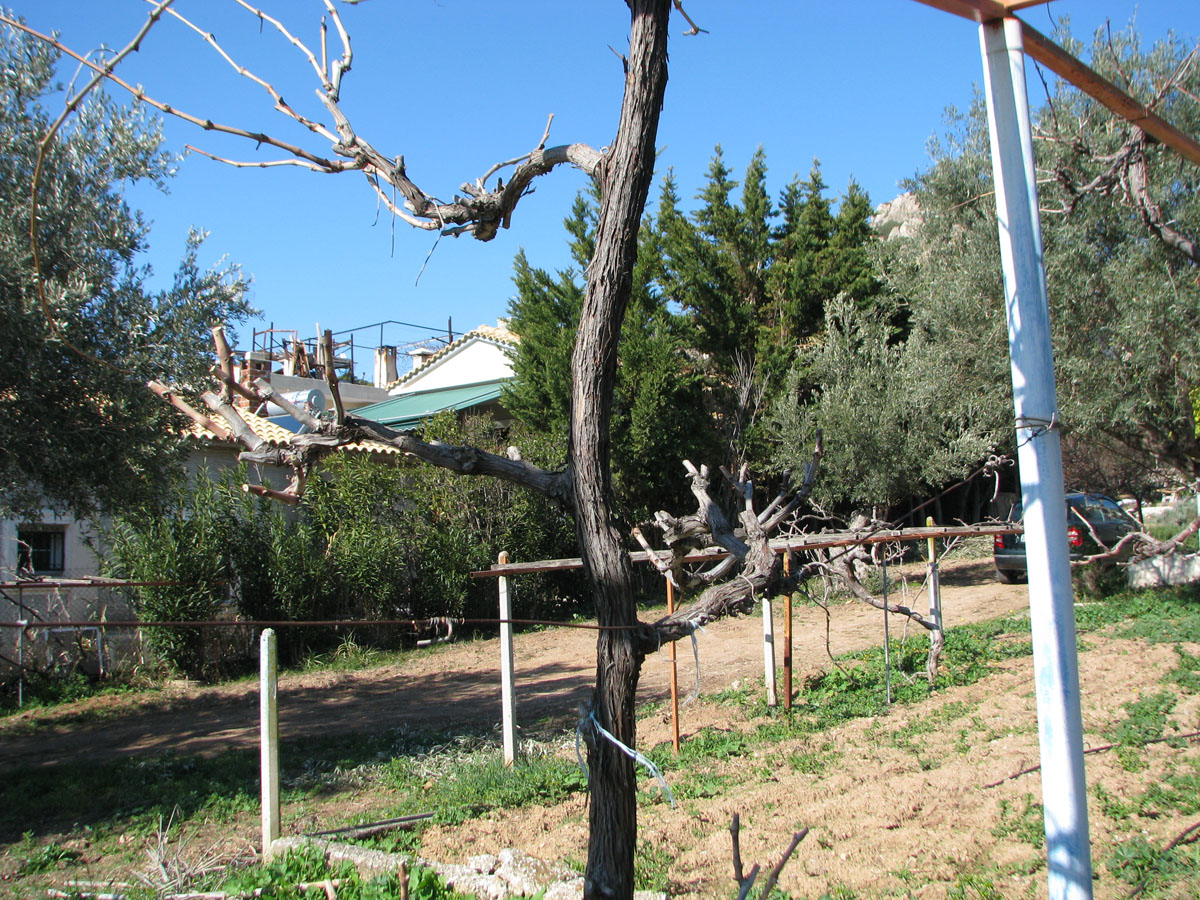
The original OLD vine. Cranberry vine that has been growing on the vine for years.
4 February.
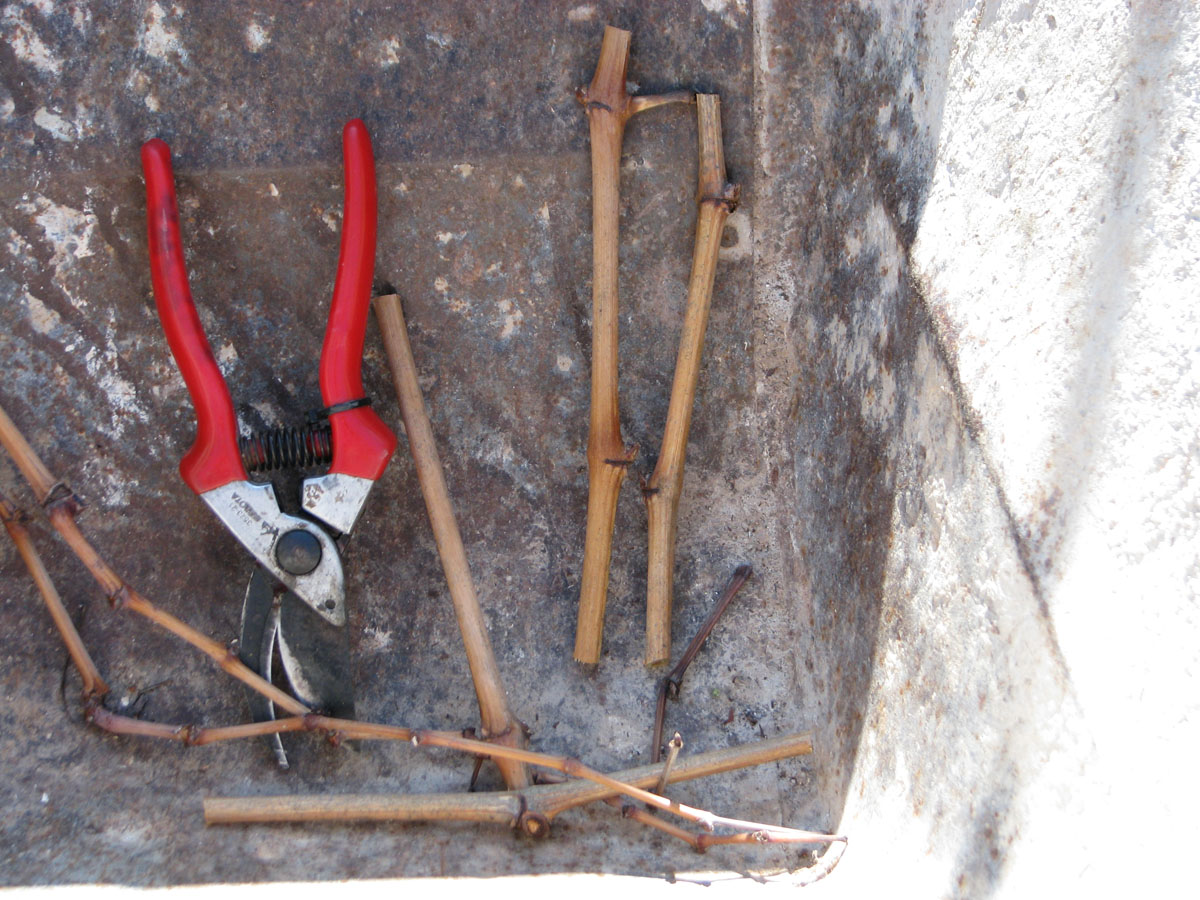
I cut from the NEW vine of table variety, two branches that are healthy and have bulbs. These will be the scions.
February 4.
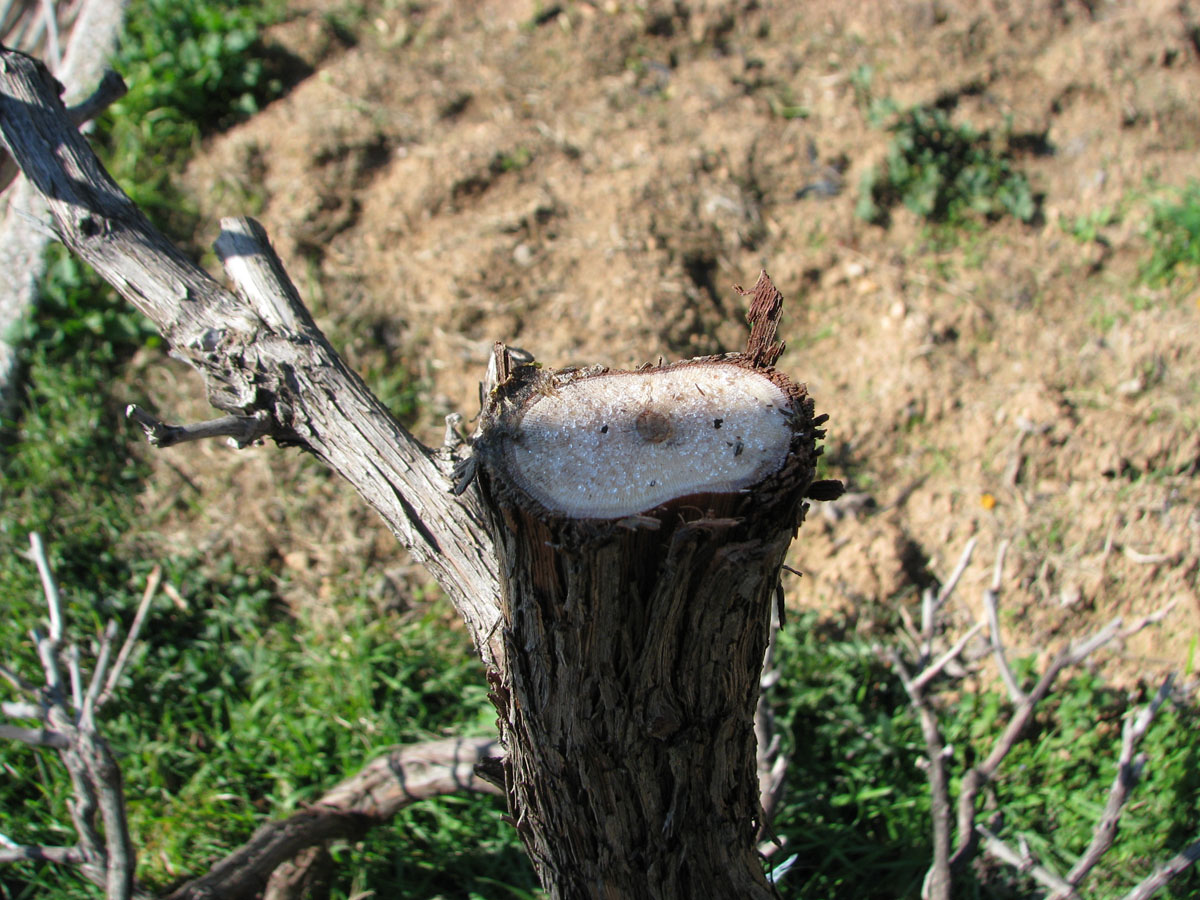
I cut the OLD vine with a saw as horizontally as I could. Notice the juice appearing in the cut. Because the cut was made in early February, the juice is not yet abundant.
February 4.
I created an incision in the OLD vine using a large sharp knife.
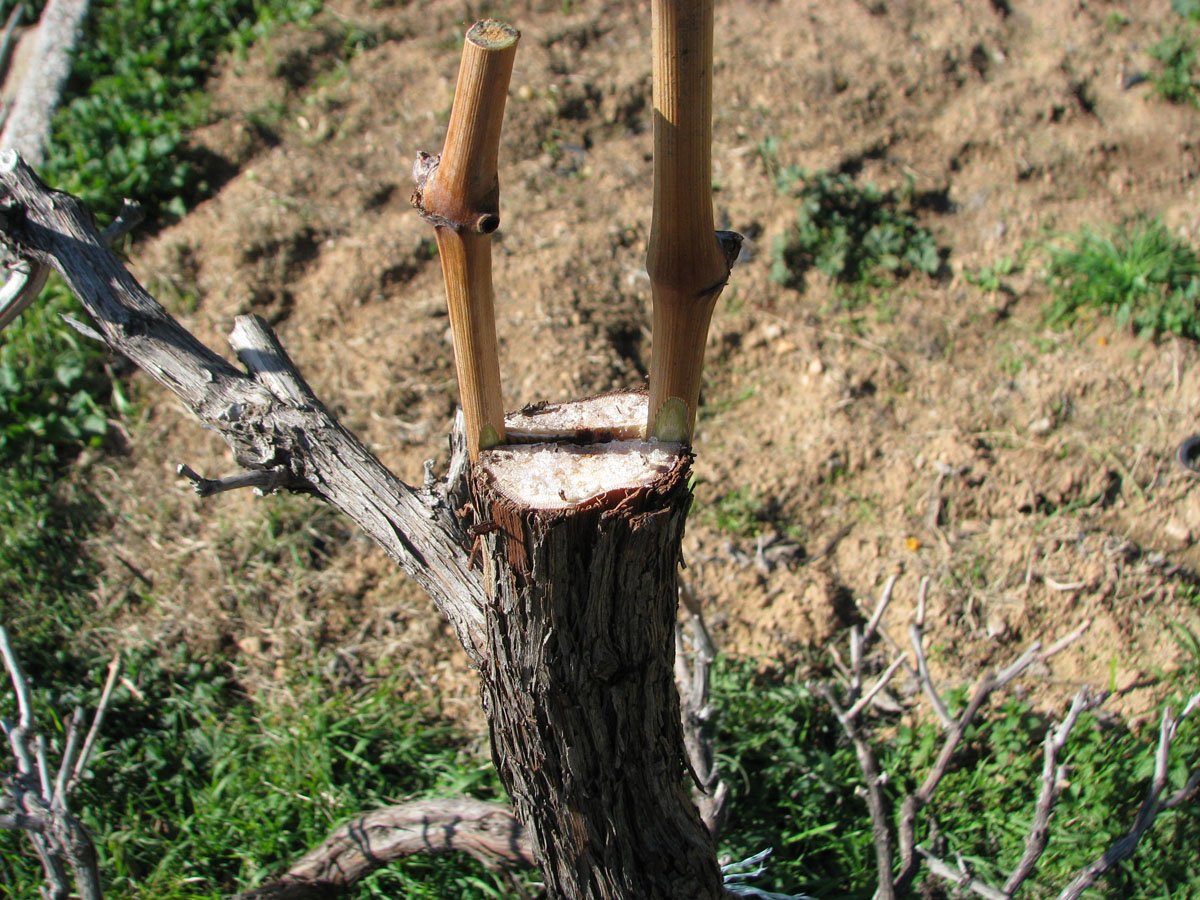
I inserted the two scions from the NEW vine into the incision after shaping one end into a wedge shape. The scions (NEW vine) were placed at the edge of the incision so that the circumference would not show a “step”.
I then filled the gap in the OLD vine between the two bolts with cotton wool so that the gap was not exposed.
February 4.
I created an incision in the OLD vine using a large sharp knife.
Then using a section of plastic water bottle, I created a sheath around the junction of the OLD and the moles from the NEW vine.
I filled the bottle with soil to keep the union of the two vines moist and dry. Notice that I have placed extra paper at the bottom to keep the soil from running off the base of the bottle.
Once a week, I poured water on the top to keep the soil moist.
4 February to early April.
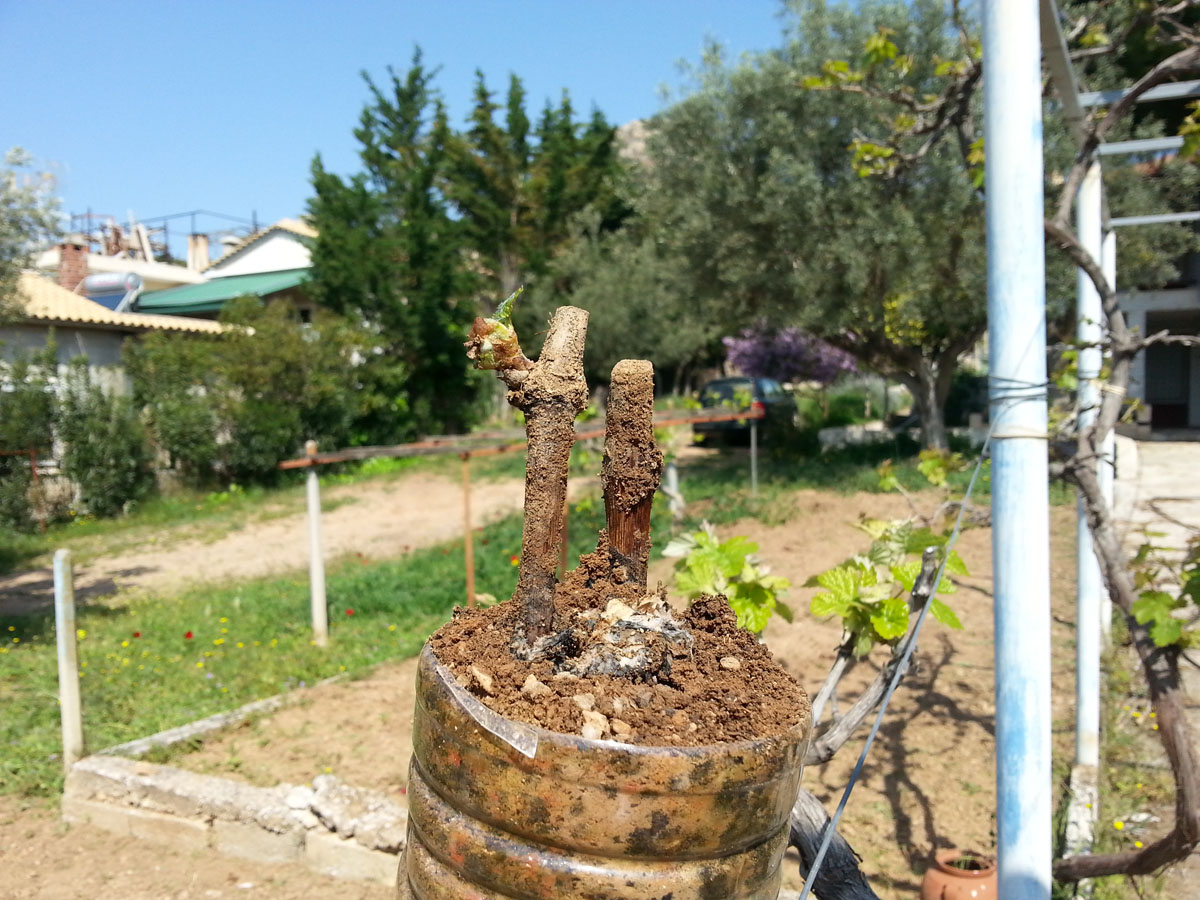
In early April, 2 months after grafting and moistening, I removed the top of the plastic bottle and the corresponding soil.
Of the two scions only one was successful. The eye of the left scion has opened and the first small leaf appeared.
The white that appears at the bottom is the cotton and paper that I had placed two months before I put the bolts in.
April.
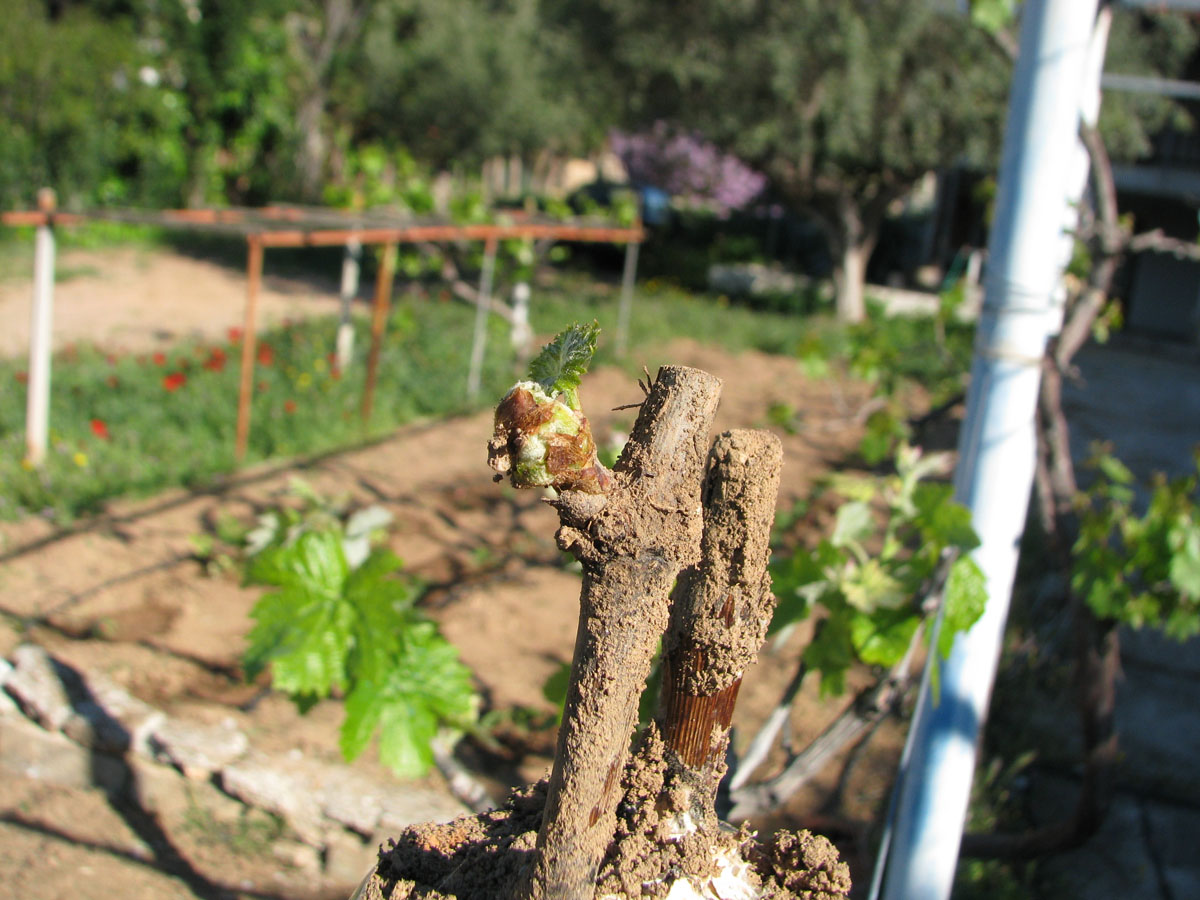
Detail of the eye on the bulb of the NEW vine as it opens to reveal its precious cargo. I notice that while the bulbs on the rest of the vine have been open and growing for a few weeks, the bulb on the scion has just begun to open. I keep the soil at the base of the scion.
April

